How to set up an Internet email account in Outlook 365
The instructions below will guide you through configuring the Email Account with us on Microsoft Outlook 365.
Note: In the example below, we will configure the email account using SSL Hostnames for SMTP and IMAP protocols.
- Step One:
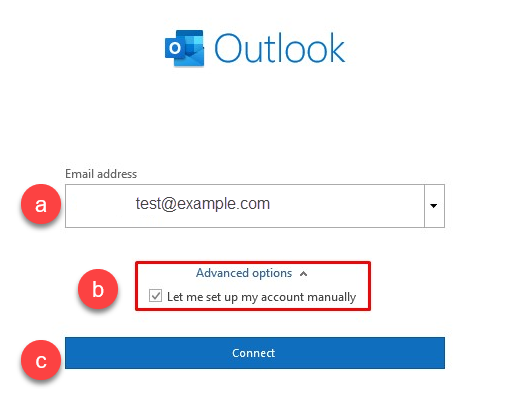
- Launch Microsoft Outlook 365 on your computer. If you are launching it for the first time, you will directly see the window as shown below. If you have some other email accounts configured on Outlook already, you can click on File Menu > Add Account to see the window as shown below.
- Enter your Email Address.
- Check the box that reads, “Let me set up my account manually.”
- Click on Connect.
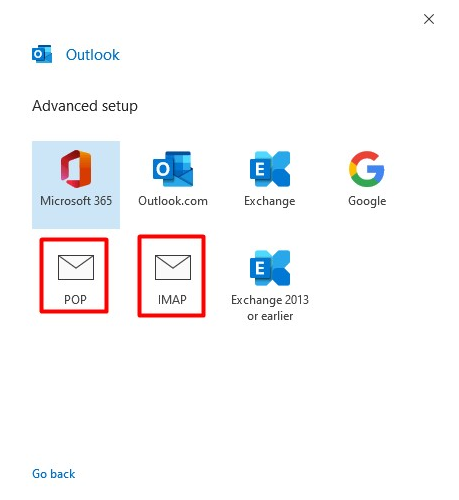
- Step 2: Select POP or IMAP depending on the Incoming Protocol you prefer. In this article, we have selected IMAP.
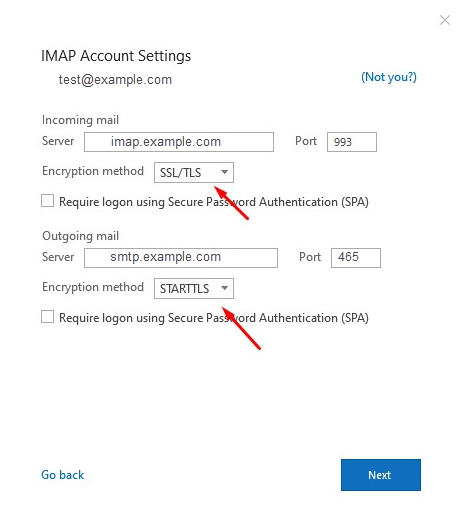
- Step 3:Refer to the Email Client Settings below, and based on your preferences, enter the respective hostnames, port numbers, and encryption methods for the Incoming Mail and Outgoing Mail servers.
Enter the following information
- Your Name: Customers Name
- Email address: example@customersdomain.com
- Incoming Server: secure.emailsrvr.com
- Outgoing Mail server: secure.emailsrvr.com
- User name: Customers Email Address [example@customersdomain.com]
- Password: Password to the customer’s email address
Click on Next.
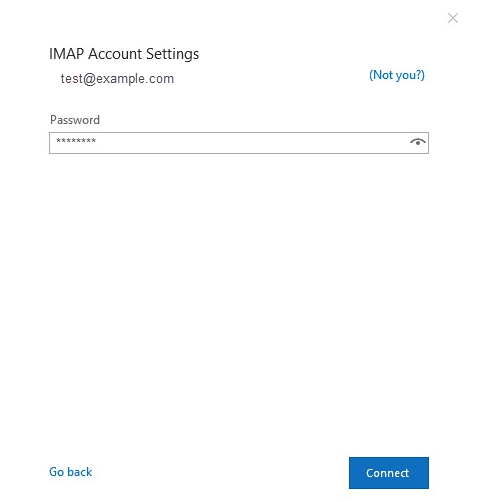
- Step 4: Enter the password for your email account with us and click on Connect.
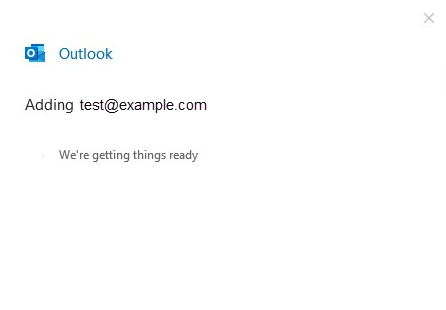
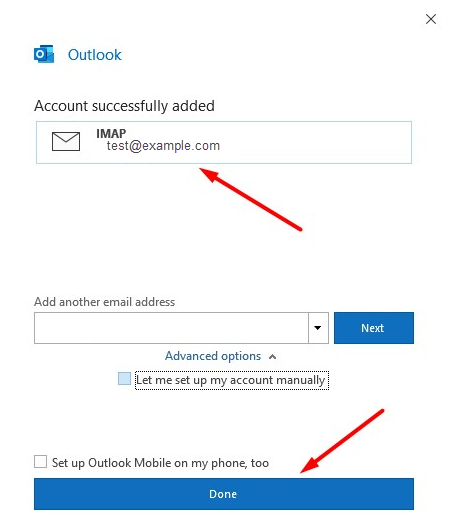
- Step 5: Your email account has been configured successfully!
Click on Done to conclude the process.
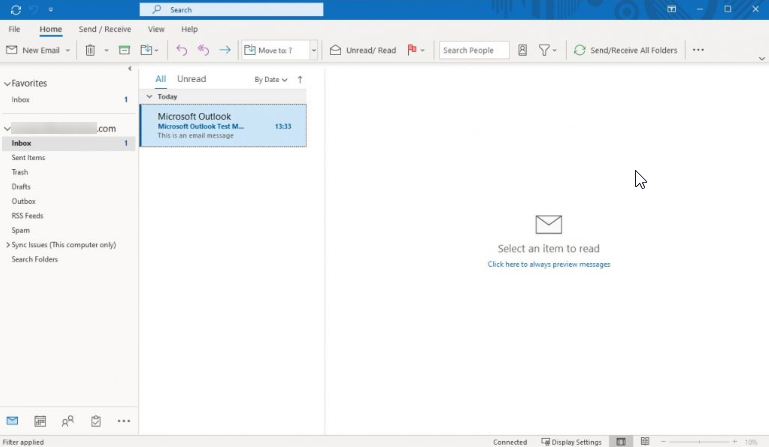
- Step 6: You can now send and receive emails on your Email Client.
Further set-up and troubleshooting information can be found here.
How to set up an Internet email account in Outlook 2013 or 2016
- Start Outlook.
- Select the File tab.
- In the Info category, select Account Settings > Account Settings in the dropdown.
- On the Email tab, select New.
- In the Add New Account dialog box, to configure the new email account automatically, configure the following settings in the Email Account section under Auto Account Setup:
- In the Your Name box, type your full name.
- In the Email Address box, type your e-mail address.
- In the Password box, type the password that your ISP provided.
- In the Retype Password box, retype the password, and then click Next to begin the Auto Account Setup process.Outlook will then try to automatically configure your account. Some ISPs require the full email address to be entered into the User Name field. If you want Outlook to automatically enter your email password, make sure that the Save this password in your password list check box is selected. If your account is successfully configured, the Add New Email Account dialog box indicates that the account is created successfully.
- Select Finish > Close.Note: If the automatic configuration fails, the Auto Account Setup feature tries to connect by using a connection that is not encrypted. If this method also fails, then the account must be configured manually.
Manually set up Internet email
To configure the Internet email account manually, follow these steps in the Add New Account dialog box:
- Select Manual setup or additional server types > Next.
- Select POP or IMAP > Next.
- Under User Information , configure the following settings:
- In the Your Name box, type your full name.
- In the Email Address box, type your full email address.
- Under Server Information, click the kind of email account that you have in the Account Type box. If you select POP3 or IMAP in the Account Type box, configure the following settings:
- In the Incoming mail server box, type the name of the server in lowercase letters. The name may be in the form of “mail.yourdomain.com.” Or, the name may be in the form of an IP address, such as 172.12.0.0.
- In the Outgoing mail server (SMTP) box, type the name of the outgoing email server in lowercase letters. The name may be in the form of “mail.yourdomain.com.” Or, the name may be in the form of an IP address, such as 172.12.0.0.
- Common port settings:
Standard (Non-SSL) IMAP Settings
- Incoming server (IMAP) is port 143
- Use the following type of encrypted connection is “None”
- Outgoing server (SMTP) is port 25 (587 also can be used if needed)
- Use the following type of encrypted connection is “None”
Standard (Non-SSL) POP3 Settings
- Incoming server (POP3) is port 110
- This server requires an encrypted connection (SSL) is not checked
- Outgoing server (SMTP) is port 25 (587 also can be used if needed)
- Use the following type of encrypted connection is “None”
- Under Logon Information, configure the following settings:
- In the User Name box, type your user name. The user name is usually the part of your email address to the left of the @ symbol.
- In the Password box, type the password that your ISP provided.
- If you want Outlook to remember your email account password, click to select the Remember password check box.
- If your ISP requires it, click to select the Require logon by using Secure Password Authentication (SPA) check box to log on by using Secure Password Authentication.
- Select Test Account Settings. When you select Test Account Settings, the following process occurs:
- The connectivity of the system to the Internet is confirmed.
- You are logged on to the SMTP server.
- You are logged on to the POP3 server.
- If the POP3 server must be logged on to first, Outlook automatically sets the Log on to incoming mail server before sending mail option.
- A test message is sent. This message explains any changes that Outlook made to the initial setup.
- Select Next > Finish.
This link provides screenshots to help walk you through the process.
For more information on this topic, read this Microsoft support article.
